Reading patterns...as clear as mud, right!
- I think most people who "mess up" do so because they miscalculate the number of repeats in a pattern. You may want to abstain from watching TV and crocheting at the same time until you get a hold of the pattern. Once you do so, you should be able to do both nicely.
- Remember to reserve enough time to finish a row or round and not to leave your work in the middle of the row (or round).
- You can read a lot about how the pattern will proceed by reading the first bit of the instructions. For example, if you find that you are chaining a small number (such as 3 or 4 chains, then joining them, chances are you are going to be working on an item "in the round". If you start by chaining a large number (such as 25, 30 or 50), then you are probably working back and forth on a piece in rows.
- Stuff contained within brackets are usually repeated a certain number of times. Read the directions inside brackets and note where the brackets begin and end before starting to crochet.
- You may be asked to go back to a star or asterisk (*) after completing a set of instructions.
- Instructions that tell you the final number of stitches at the end of each row are helpful (e.g. 15 dc).
- When working in rows, count the number of stitches at the end of the row. Make sure that for the next several rows, you have the same number of stitches. If you don't keep track of this, your work will begin to get progressivly larger or smaller as you work. It's quite easy to add an extra stitch or drop a stitch without realizing it.
- If the pattern frustrates you or you're getting bored with it, leave it and find another pattern.
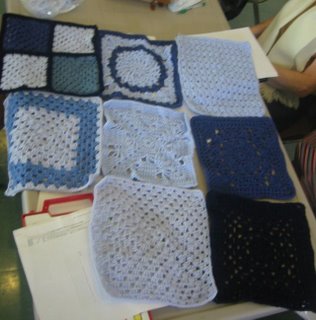
We also had a brief show and tell after our pattern reading session. Phyllis brought in some thread crochet doilies that were exquisite. They were quite tiny and as thin as a wafer. We also put all the squares together to see how many we had. Our grand total this week is 8. Here are some photos of the completed squares.

I wish I could have taken a better photo that wasn't so blurry.
 Another, clearer, collective photo

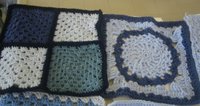
Martha made 3 mini-squares and Phyllis made 1.
They were all joined to make one 12" square (left).
Phyllis made the square with the circular pattern (right)

Gwen shows a great use of two colours (left). Phyllis made a pretty butterfly square (right).
A special thanks, again, to Leanne who had taken the squares home last weekend and sewed in all the ends!
Next week, we'll decide how many squares we'll need to put together our first project. We're undecided as to whether to make the afghan square or rectangular. We're also not sure whether to put together 9-12" squares in a 3x3 configuration or 12-12" squares in a 3x4 configuration.
Keep those squares a comin'

<< Home